
A practical Crafting loop
Turn spare mission gear and gathered materials into a repeatable Crafting session with Vagabond’s Attire.
The equipment goal
Use these community images to recognise the subject. Open an image for a larger view.
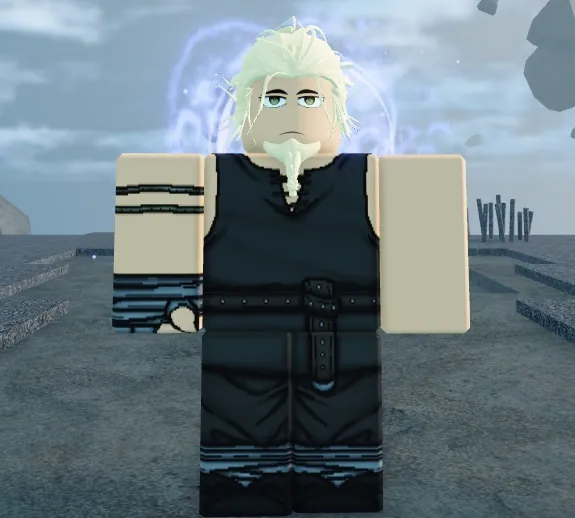
Choose a recipe before gathering
Fartmiser’s October 25 walkthrough builds a Crafting routine around Vagabond’s Attire. The demonstrated recipe uses 5 Cloth and 2 String, matching the saved community equipment table. This makes it a concrete recipe to check before spending a session collecting unrelated materials.
The routine is: run suitable missions, collect spare gear, recover usable materials at the blacksmith, then craft the outfit. The video also uses Bamboo to make missing Cloth and String. Check the recipes and quantities in your current crafting interface before processing a batch.
This is a creator-demonstrated training loop. It is not a measured fastest method or a guarantee of experience per hour.
Prepare your inventory
Before starting, open the outfit recipe and confirm that you can craft it. Learn the required schematic if your interface asks for one; the creator learns a schematic during the blacksmith sequence at 1:53.
Lock the equipment you want to keep before processing spare gear. The creator explicitly calls out this step at 1:48. Check equipped pieces, useful alternatives and anything with desirable stars rather than treating every mission drop as scrap.
Collect spare gear through missions
At 0:22, the creator recommends D-rank missions and bandit camps in Kamo Forest. Their aim is to collect unwanted clothing and other pieces that provide useful materials through the blacksmith’s recovery process.
Use missions your character can comfortably finish. Deepshaken’s separate beginner guide also describes equipment coming from mission and side-quest chests at 5:53. That supports collecting usable gear while progressing, but it does not promise a particular salvage yield from every chest or item.
Recover materials and fill the gaps
Return to the blacksmith and inspect what each unwanted item will return. The tutorial calls the processing action “smelt”; follow the current interface’s item preview and confirm the selected pieces before proceeding.
| What you have | Next action |
|---|---|
| Spare gear you do not need | Check its recoverable materials and process only the selected pieces |
| Enough Cloth and String | Craft the outfit using the current recipe |
| Bamboo but missing processed materials | Check the material recipes; the creator makes Cloth and String in the demonstration |
| Valuable gear mixed with unwanted drops | Lock the keepers and review the selection again |
The material-to-outfit sequence starts at 2:05. Count the materials for the number of crafts you intend to make rather than processing your entire inventory without a target.
Check progress after one craft
Make one craft, then inspect the profession progress shown by your game. Confirm that the action advances the track you intended before repeating it.
The video’s final experience narration is not clear enough to establish a dependable XP amount. Travel, mission availability, material returns and any current profession gate also affect the session. No fixed XP rate or time-to-max is claimed here.
Crafting quality is a separate issue: the profession reference lists star-related perks, while the actual crafted item determines its rolled quality and equipment requirements. A training recipe is not automatically the best item to equip.
How other walkthroughs fit
Keiito’s profession discussion at 2:36 explains why a build may invest in Crafting for later armor. That video recommends a level-15 Crafting target, while the current profession reference describes a six-tier structure. These are not interchangeable milestones, so use the specific recipe and current profession interface to decide your next gate.
The new tutorial’s description also suggests that harvesting Bamboo may be faster if you only want Crafting experience. It supplies no side-by-side timing test. Treat gathering and the mission-loot loop as alternatives to compare with your available tools and recipes, rather than declaring either universally fastest.
For a session that also advances quests and collects gear, the mission loop offers several useful outputs. For a session focused on one profession, check which action actually gives that profession’s experience and which materials are currently easy for you to obtain.
Video notes & demonstrations
Recent walkthroughs and demonstrations used on this page. Each clip links to the relevant moment; creator reports and opinions are distinguished from measurements by this wiki.
Clover RPG Day 1 Beginners Guide (Grimoire, Progression, Etc.)
Dated creator walkthrough · narration reviewedShows early progression and distinguishes Grimoire Echo passives from Meditation abilities. Its level-10 claim is superseded by the level-15 correction in the other recent guide.
The BEST BUILD GUIDE in Clover Rpg... (Stat Resets, Races and Clans)
Dated creator walkthrough · narration reviewedExplains point types and planning considerations. The narration contains pre-release wording; its suggested allocations and older attribute names are not a current tested build.
How to Level crafting FAST in Clover RPG
Dated creator walkthrough · narration reviewedA mission-loot and material-recovery routine for Vagabond’s Attire. The 5 Cloth / 2 String recipe matches the equipment reference; the video does not establish a reliable XP rate or a fastest method.
Sources & review notes
References reviewed October 26, 2026. Community information can change with game updates. These notes are source-based and have not been verified through our own gameplay.
- Fartmiser · How to Level crafting FAST in Clover RPG A mission-loot and material-recovery routine for Vagabond’s Attire. The 5 Cloth / 2 String recipe matches the equipment reference; the video does not establish a reliable XP rate or a fastest method.
- Keiito · The BEST BUILD GUIDE in Clover Rpg... (Stat Resets, Races and Clans) Explains point types and planning considerations. The narration contains pre-release wording; its suggested allocations and older attribute names are not a current tested build.
- Deepshaken · Clover RPG Day 1 Beginners Guide (Grimoire, Progression, Etc.) Shows early progression and distinguishes Grimoire Echo passives from Meditation abilities. Its level-10 claim is superseded by the level-15 correction in the other recent guide.
- Equipment Listed equipment stats, requirements, materials, and the star/vanity distinction.
- Professions Five documented profession tracks with six tiers per track.